
How To Clean Coffee Maker Carafe: A Model-Specific Guide
Disclosure: We may earn a commission when you buy through links on this page, at no extra cost to you. As an Amazon Associate I earn from qualifying purchases. Learn more

How to clean coffee maker carafe parts safely: glass or thermal, lids and seals, approved cleaners and when the problem is really descaling.
Knowing how to clean coffee maker carafe parts properly depends first on what your carafe is made of: a glass pot that sits on a warming plate, or an insulated stainless steel thermal carafe with a brew-through lid. This guide covers both, plus the lids and seals that collect most of the stale coffee taste, using your machine's manual as the rulebook.
Carafe washing removes coffee oils and stains. It is not descaling, which removes mineral scale from inside the machine, so we keep the two jobs separate and point you to the right page for the second one.

Quick Answer and Task Boundary
For a glass carafe, let it cool, empty it, then wash it with warm water and mild dish soap or a coffee pot cleaner your manual allows, using a soft brush, and rinse well. For a thermal carafe, take the lid apart as the manual shows, wash the inside with a bottle brush and a cleaner approved for stainless steel, and never soak or put it in the dishwasher unless the manual says it is dishwasher safe. Lids and seals get washed separately and dried before reassembly.
If your coffee tastes off even with a clean carafe, or the machine shows a clean or descale prompt, that is a different task: see our guide on how to descale a coffee maker.
Identify the Model and the Right Maintenance Task
Find the Exact Model and Manual
Look for the model number on the label under or behind the machine, then find the manual in the box or on the manufacturer's US support site. Note the full model code, since one brand may sell a glass-carafe and a thermal-carafe version under similar names. Turn to the care and cleaning section, which tells you which parts are dishwasher safe, which cleaners are allowed and how the lid comes apart.
Check Whether This Is Cleaning or Descaling
Carafe cleaning fixes brown stains, an oily film, a stale smell or a lid that drips. Glass carafes mainly collect stains and oils; insulated thermal carafes also trap coffee in the lid valve and under the seal. Descaling fixes slow brewing, a descale light or white mineral deposits inside the machine. If your symptom is in the second group, cleaning the carafe will not solve it.
What You Need Before Starting
Check the manual for dishwasher suitability first: many glass carafes are top-rack dishwasher safe, while many thermal carafes and lids are hand wash only, because heat and detergent can damage the vacuum seal or gaskets. Then gather only supplies that are compatible with your carafe material.
- Warm water and a mild dish soap, unless the manual specifies something else.
- A soft sponge or non-scratch brush for glass, and a long bottle brush for a thermal carafe.
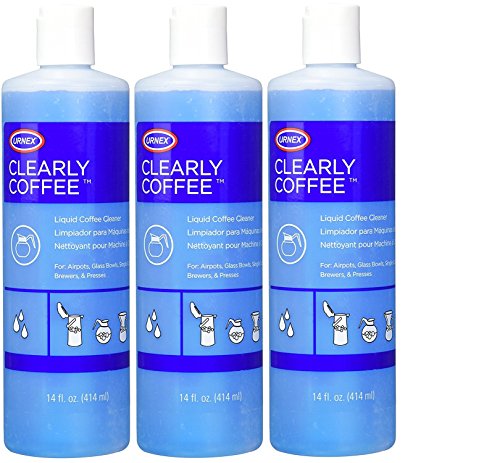
- Optionally, a coffee pot cleaner made for glass and stainless servers, used as its label directs and only where the manual allows cleaners.
- A clean towel or drying rack, and a small bowl to hold lid parts and seals.
Let a glass carafe cool fully before washing, since sudden temperature changes can crack it. Switch off and unplug the machine before you handle the warming plate or brew basket area.
How To Clean Coffee Maker Carafe: Step-by-Step Procedure
Prepare the Correct Components
Empty the carafe and let it cool to room temperature. For a glass carafe, remove the lid if it lifts off; some glass carafe lids are fixed, and the manual will say so. For a thermal carafe, follow the manual's steps to take the lid apart: many lids unscrew, and some have a removable valve or a center plug that controls flow from the brew basket.
Lay the parts out in order on a towel so you can reassemble them correctly. Check the seals and gaskets for cracks or stiffness, which can cause drips and may need replacement parts from the manufacturer.
While the carafe is out, glance at the brew basket and the drip-stop valve above the carafe. Grounds stuck around that valve can make the carafe overflow or drip on the warming plate. Clean the basket as the manual describes, but leave internal parts of the machine alone.
Remember what you are removing: coffee oils, tannin stains and leftover grounds. You are not removing mineral scale from the machine's water path, so there is no need for descaler in this task, and you should not mix descaling products into carafe washing unless your manual specifically says to.
Start the Approved Task or Program
Carafe cleaning is normally a manual wash, not a machine program. Most drip coffee makers have no carafe cleaning cycle; the self-clean or clean button on some models runs a descaling or brew-path cycle through the machine, which is a different job.
If your manual describes brewing a cleaning solution through the machine into the carafe, follow its exact steps and product guidance, and only use products it approves. Some coffee maker cleaners are designed to run through a brewing cycle and clean the carafe at the same time, but whether that is right for your machine is the manual's call, not a general rule.
For a dishwasher-safe glass carafe, you can place it on the top rack as the manual directs. For everything else, start the hand wash below.
Complete the Cleaning or Descaling Stage
Fill the sink or a basin with warm water and a little mild dish soap. Wash the glass carafe inside and out with a soft sponge, paying attention to the spout and the area where coffee sits in the bottom. For stubborn brown rings, a coffee pot cleaner approved for glass can help; use it at the strength and contact time printed on its label.
For a thermal carafe, add warm soapy water or an approved cleaner and scrub the inside with a long bottle brush, reaching the bottom and shoulder where oils collect. Do not submerge the outer body unless the manual allows it, and never use bleach, steel wool or abrasive powders unless the manual approves them, since they can damage stainless steel and seals.
Wash lid parts and seals separately with a small brush, pushing through the valve and spout openings. Avoid repeating harsh cleaners over and over; if a stain stays after one approved treatment, accept a light stain rather than risking the finish.
Thermal carafes deserve extra attention to smell. Because you cannot see inside, a carafe can look fine while the lid valve holds old coffee that turns sour. Sniff the empty carafe and the lid after washing; a lingering stale smell usually means a part of the lid was missed, not that the steel needs a stronger chemical.
Finish the Required Rinse and Reassembly
Rinse every part thoroughly with clean warm water until there is no soap or cleaner smell. Some cleaners are colored to help you see when they are rinsed away; rinse until the water runs clear. Leftover cleaner can affect taste.
Let everything air dry, with the thermal carafe upside down and the lid open, so moisture does not stay trapped under the seal. Reassemble the lid in the order the manual shows, making sure seals sit flat in their grooves.
Before the next full pot, the manual may suggest brewing a carafe of plain water or simply rinsing again. Place the carafe back in the machine and check that it sits correctly on the warming plate or under the brew basket, since a misaligned carafe can stop the drip-stop valve from opening.
Check the Result Before Normal Use
Confirm Completion
A clean carafe looks clear, smells neutral and pours without dribbling from the lid. Check that the lid closes and opens smoothly and that the valve on a thermal carafe lid moves freely. Make sure the carafe sits fully in place, as the manual describes, so the brew basket can drain into it.
If a Prompt or Symptom Remains
If a clean light or descale indicator is still on, that is a machine maintenance prompt, not a carafe issue; follow the manual's instructions for that program. If coffee still tastes stale with a clean carafe, check the brew basket and showerhead. If the lid leaks after reassembly, recheck the seal and contact the manufacturer for replacement parts rather than repeating chemical cleans.
Common Mistakes to Avoid
- Using the wrong task: descaler targets mineral scale inside the machine; coffee oils in a carafe need a cleaner or soap, and milk residue needs a milk cleaner on machines with milk parts.
- Treating products as interchangeable: vinegar, cleaning tablets, coffee pot cleaners and descaler do different jobs. Use vinegar only if your manual approves it.
- Dishwashing without approval: putting a thermal carafe or lid in the dishwasher, or soaking it, can damage the vacuum seal or gaskets when the manual says hand wash only.
- Copying another model's method: lid designs and valves vary between generations, so a method for one machine's lid may not fit yours.
- Washing a hot glass carafe: sudden cold water on hot glass can crack it.
Frequently Asked Questions
Which cleaner is approved for this model?
The approved cleaner is whatever your manual lists for the carafe, which is usually warm water and mild dish soap. Some manufacturers allow coffee pot cleaners made for glass and stainless servers, while others warn against specific chemicals. If the manual does not mention a product, contact the manufacturer before using it on a thermal carafe or seal.
How often should I perform this task?
Rinse the carafe after every use and wash it with soap daily if you brew daily. A deeper clean with an approved cleaner every week or two handles stains and oil film. For the wider schedule, including descaling and brew basket care, see our coffee maker maintenance guide.
What if the cleaning or descaling alert remains?
A cleaning or descaling alert is triggered by the machine, not the carafe, so washing the carafe will not clear it. Follow the manual's procedure for that alert, including any reset step it describes. If the alert stays on after the documented procedure, use the manual's troubleshooting section or contact support.
Can I use a generic method from another coffee maker?
Only for the basic part: warm soapy water and a soft brush are safe for most glass carafes. For thermal carafes, lids, seals and any brewed-through cleaning, follow your own model's manual, since dishwasher limits and lid designs differ. When problems persist, our coffee maker troubleshooting guide helps narrow down the cause.
Keep the Routine Simple
The routine for how to clean coffee maker carafe parts is short: let it cool, take the lid apart as the manual shows, wash with soap or an approved cleaner, rinse well and dry with the lid open. Keep descaling as a separate job on its own schedule.
If you remember one thing about how to clean coffee maker carafe parts, make it this: the manual decides what goes in the dishwasher and which cleaners are allowed. Daily rinsing prevents most stains before they start.
Two small habits make the job easier. Empty leftover coffee soon after you finish instead of letting it bake on the warming plate, and leave the carafe lid open to dry overnight. Both reduce stains, smells and the need for stronger cleaners later.


