
How To Clean Keurig: A Model-Specific Guide
Disclosure: We may earn a commission when you buy through links on this page, at no extra cost to you. As an Amazon Associate I earn from qualifying purchases. Learn more

How to clean Keurig brewers by model: removable parts, pod holder and needles, rinse pods, carafe and frother care, and when to descale.
Working out how to clean Keurig brewers properly starts with knowing which Keurig you own, because a one-cup K-Mini, a K-Supreme Plus, a K-Cafe with a frother and a K-Duo with a carafe side do not share the same parts or controls. This guide covers the cleaning tasks that apply to Keurig single-serve and combination machines, and shows where your model's manual takes over.
Cleaning removes coffee residue, oils and grime from the parts you can reach. Descaling removes mineral scale from inside the machine, and milk cleaning applies only to models with a frother. We keep those jobs separate so you do the right one.
Quick Answer and Task Boundary
To clean a Keurig, unplug it, wash the removable parts (drip tray, pod holder, reservoir and lid) with warm soapy water as the manual allows, wipe the exterior, and use Keurig rinse pods or water-only brews to flush residue from the brew path between flavors. Carafe models also need the carafe and brew basket washed, and frother models need the frother cleaned as their manual directs. Descaling is a separate job on its own schedule.
For the descaling part, see our guide on how to descale a coffee maker and your Keurig manual's descale section.
Identify the Model and the Right Maintenance Task
Find the Exact Model and Manual
Find the model name and number on the label on the bottom or back of the brewer, then download the manual from Keurig's US support site if you need it. Write down the full name, such as K-Supreme Plus SMART or K-Duo Hot and Iced, because K-Duo, K-Mini, K-Supreme and Plus variants have different reservoirs, controls and parts. The care section lists what is dishwasher safe and how parts come out.
Check Whether This Is Cleaning or Descaling
Cleaning fixes residue in the pod holder, grounds in cups, sticky drip trays, flavor carry-over between pods and a dirty reservoir. Descaling fixes slow or short brews caused by mineral scale and responds to a descale indicator on models that have one. Milk cleaning applies only to frother models such as the K-Cafe. Identify which symptom you have before choosing supplies.
A few model differences change the routine. One-cup reservoir brewers like the K-Mini have no tank that holds water between brews, so there is less to wash but you add fresh water every time. Multi-cup models like the K-Classic or K-Slim keep water in a removable reservoir that needs regular washing. Smart models with app features still need the same physical cleaning; the app does not clean the parts for you.
What You Need Before Starting
Check which parts your manual lists as dishwasher safe; many drip trays and pod holders are top-rack safe on some models and hand wash only on others. Gather compatible supplies and keep the list short.
- Warm water, mild dish soap and a soft cloth or sponge.
- A soft brush for the pod holder and drip tray grill.
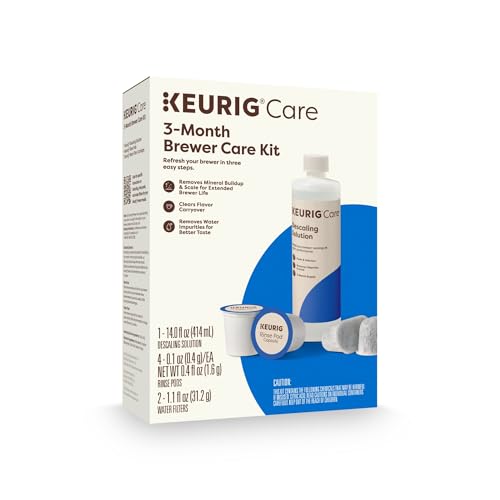
- Keurig rinse pods, if you want to flush residue between brews; Keurig's 3-Month Brewer Care Maintenance Kit includes rinse pods, descaling solution and water filter refills.
- Replacement water filter cartridges, if your model has a filter handle.
- For K-Duo models, a brush and soap for the carafe and brew basket.
Unplug the brewer before removing parts or wiping near the needle area. Rinse pod cycles and descaling programs run with the machine on and follow the manual's steps.
How To Clean Keurig: Step-by-Step Procedure
Prepare the Correct Components
Switch off and unplug the brewer. Remove the drip tray and grill, lift off the reservoir and lid, and take out the water filter handle if your model has one. Open the pod holder area and remove the pod holder assembly only if the manual says it is removable on your model and shows how.
Be careful near the needles. Keurig pod holders have a needle that pierces the bottom of the pod, and the brewer has an entrance needle above that pierces the lid. Both are sharp, and the manual describes how to clean them on your model. Do not improvise with tools the manual does not mention.
Keep in mind what you are removing: coffee residue, oils and grounds. Mineral scale inside the heater is a descaling job, so you do not need descaler for this task.
Start the Approved Task or Program
Most of a Keurig clean is manual washing. The powered part is flushing the brew path, which many owners do with Keurig rinse pods: according to Keurig, you use them just like a regular K-Cup pod, and they rinse away residue and oils from the pod holder area and reduce flavor carry-over between brews.
Some newer Keurig models have menu options or indicator lights for cleaning or descaling, and the steps differ by model. Use only the buttons and menus your manual lists for your exact brewer, since copying steps from another Keurig model can start the wrong program or leave the machine waiting for input.
If you do not have rinse pods, brewing one or two cups of plain water without a pod is a simple way to flush the path, as long as your manual does not say otherwise.
Complete the Cleaning or Descaling Stage
Wash the drip tray and grill in warm soapy water, scrubbing coffee stains with a soft brush. Wash the reservoir and lid with mild soap and rinse well, but treat the water filter cartridge separately and replace it on the schedule in its instructions instead of washing it with soap.
Clean the pod holder as the manual describes, rinsing away grounds and residue and checking that the exit needle is clear. Wipe the area around the entrance needle with a damp cloth while the machine is unplugged, keeping fingers away from the needle tip.
For K-Duo machines, wash the carafe, lid and brew basket with warm soapy water as their care section allows. For K-Cafe and other frother models, follow the frother's own cleaning instructions, since milk parts need prompt care. Wipe the exterior with a damp cloth, never submerging the brewer or letting water run into the base.
Finish the Required Rinse and Reassembly
Rinse every washed part thoroughly so no soap remains, then let parts air dry or wipe them with a clean cloth. Refit the water filter handle with a fresh or valid cartridge, then reattach the reservoir, pod holder, drip tray and grill as the manual shows.
Fill the reservoir with fresh water, plug the brewer in and run a rinse pod or one to two water-only brews to flush any soap or loosened residue, pouring that water away. Check that the pod holder closes smoothly and that no water leaks around the reservoir base.
A simple weekly rhythm keeps this manageable: on one day each week, wash the drip tray, reservoir and pod holder, run a rinse pod, and check the filter date. Daily, empty the drip tray and remove the used pod right after brewing, since a pod left in the holder overnight leaves residue and can drip into the next cup.
If your model uses a cleaning or descale indicator, check whether the manual describes a reset after the task; some models clear the prompt only after a full descaling program.
Check the Result Before Normal Use
Confirm Completion
Your Keurig is clean when parts look and smell fresh, the pod holder closes without force, water flows normally into the cup during a water-only brew, and no grounds appear in the cup. Make sure the reservoir seats fully and the drip tray sits level.
If a Prompt or Symptom Remains
If brews are still short or slow after cleaning, mineral scale or a clogged needle is more likely; follow the manual's descale or needle cleaning steps. If an indicator stays on, use the manual's troubleshooting section or Keurig support. Avoid repeating rinse or chemical cycles blindly, which wastes supplies without addressing the cause.
If you are going away for more than a few days, empty the reservoir and drip tray, leave the lid open to dry, and run a water-only brew when you return. Water that sits for days in a warm kitchen can taste stale even in a clean machine.
Common Mistakes to Avoid
- Using the wrong task: rinse pods and soap clean residue, descaling solution removes mineral scale, and frother cleaning handles milk residue.
- Treating products as interchangeable: vinegar, cleaning tablets and descaling solution are not the same. Use vinegar only if your Keurig manual approves it.
- Dishwashing without approval: some Keurig parts are top-rack safe and others are not, depending on the model.
- Copying controls from another model: menus, buttons and indicator lights differ across K-Mini, K-Supreme, K-Cafe and K-Duo generations.
- Washing the water filter with soap: replace cartridges on schedule instead.
Frequently Asked Questions
Which cleaner is approved for this model?
For removable parts, most Keurig manuals call for warm water and mild dish soap. For the brew path, Keurig sells rinse pods and its own descaling solution, both included in its 3-Month Brewer Care Maintenance Kit. Check your model's manual for anything beyond that, especially before using third-party cleaners or vinegar.
How often should I perform this task?
Empty the drip tray and wipe spills daily, wash removable parts weekly, and use a rinse pod when switching between strong flavors. Keurig's maintenance kit describes descaling every three months, though your manual and water hardness set the real schedule. See our coffee maker maintenance guide for a full routine.
What if the cleaning or descaling alert remains?
A descale alert usually clears only after the full descaling procedure your manual describes, not after a simple wash. Complete that procedure, including the rinse brews. If the alert remains, look up your model in the manual's troubleshooting section or contact Keurig support with your model number.
Can I use a generic method from another coffee maker?
Washing removable parts in warm soapy water applies broadly, but needles, pod holders, menus and frothers are model specific. Use your own Keurig manual for those parts. For brewers that still misbehave after cleaning, our coffee maker troubleshooting guide helps narrow down the cause.
Keep the Routine Simple
The routine for how to clean Keurig brewers comes down to washing the removable parts weekly, flushing the brew path with rinse pods or water-only brews, keeping needles clear as the manual shows, and descaling on schedule. Frother and carafe models add their own parts.
Once you know how to clean Keurig parts for your exact model, the whole job takes a few minutes. For model choices if you are replacing an older brewer, see our guide to the best Keurig coffee maker.


