How to Froth Milk at Home: 6 Easy Methods
Disclosure: We may earn a commission when you buy through links on this page, at no extra cost to you. As an Amazon Associate I earn from qualifying purchases. Learn more

How to froth milk at home with six easy methods, the best milks, ideal temperatures and cold foam tips.
Learning how to froth milk at home lets you make lattes, cappuccinos and cold foam drinks without a café. You do not need an expensive machine: a handheld frother, an electric frother, a French press or even a jar with a lid can turn cold or warm milk into creamy foam in under a minute. The secret is starting with the right milk, warming it to the right temperature, and adding air before smoothing the foam.
This guide walks through six methods, from steam wands to a simple jar, plus milk choices, temperatures, foam textures for different drinks, troubleshooting and cleaning.


Frothing Basics: What Makes Good Foam
Milk foam forms when air bubbles get trapped by milk proteins. Fat adds creaminess and stability. Good foam has small, even bubbles, a glossy surface and a texture like wet paint for lattes, or a thicker, airy cap for cappuccinos. Large bubbles that pop quickly usually mean too much air too fast or milk that was too warm when frothing started.
Temperature matters. Milk tastes sweetest around 140 to 150°F. Above about 160°F, proteins break down, foam collapses and the milk can taste cooked. For cold foam, keep the milk as cold as possible.
Choosing the Best Milk for Frothing
Whole milk is the easiest to froth into creamy, stable foam because of its balance of fat and protein. Two percent milk makes lighter but still smooth foam. Skim milk creates lots of airy foam that is stiff and less creamy, and it collapses faster.
For plant milks, barista editions are formulated with extra protein or stabilizers so they foam like dairy. Barista oat milk is the most popular, followed by barista soy and almond milks. Regular plant milks often produce thin foam or separate when heated. Always use fresh, cold milk straight from the refrigerator.
How to Froth Milk at Home: 6 Methods
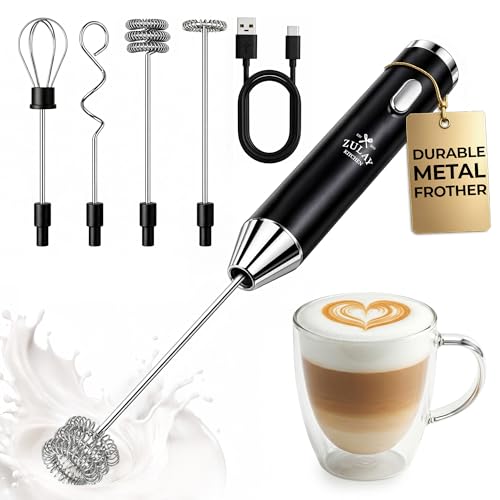
Method 1: Handheld Frother
- Warm milk to about 140 to 150°F in a microwave or saucepan, or keep it cold for cold foam.
- Pour it into a tall mug or pitcher, no more than one third full.
- Submerge the whisk just below the surface and switch it on.
- Froth for 15 to 30 seconds, moving the whisk slowly up and down, then lower it to smooth the foam.
- Switch off before lifting it out, tap the container and swirl.
Handheld frothers are cheap and compact. See our guide to the best handheld milk frother for recommendations.
Method 2: Electric Frother
Pour cold milk between the MIN and MAX lines, choose hot foam, hot milk or cold foam, and press start. The frother heats and whips the milk automatically and stops when finished, usually in one and a half to three minutes. This is the most consistent, hands-free method. Compare models in our guide to the best electric milk frother.
Method 3: Espresso Machine Steam Wand
- Fill a stainless steel pitcher about one third with cold milk.
- Purge the wand to clear water, then place the tip just below the surface.
- Turn on steam and listen for a gentle hissing as air enters, lowering the pitcher as the milk rises.
- When the milk has expanded about 20 to 50 percent, sink the tip slightly to create a whirlpool.
- Stop at about 140 to 150°F, when the pitcher feels too hot to hold. Purge and wipe the wand.
- Tap and swirl the pitcher until glossy, then pour.
A good pitcher makes steaming easier; see our guide to the best milk frothing pitcher.
Method 4: French Press
Warm milk and pour it into a clean French press, filling no more than one third. Place the lid and pump the plunger quickly up and down for 20 to 30 seconds until the milk roughly doubles. Let it rest for a few seconds, then pour. The fine mesh makes surprisingly good foam. For cold foam, use very cold milk and pump longer.
Method 5: Jar With a Lid
Pour milk into a jar, filling it no more than halfway, close the lid tightly and shake hard for 30 to 60 seconds until the milk foams and doubles. For hot foam, remove the lid and microwave the jar for about 30 seconds to warm and stabilize the foam. Use a microwave safe jar and never microwave a metal lid.
Method 6: Whisk
Warm milk in a saucepan, then whisk vigorously by hand, tilting the pan so the whisk catches air. It takes a minute or two of effort, but it works when you have no other tools. A small balloon whisk gives the best results.
Which Method Should You Use?
Each method has strengths. A steam wand makes the finest microfoam for latte art but requires an espresso machine and practice. An electric frother is the most convenient for daily hot and cold foam. A handheld frother is the cheapest and most portable, while a French press makes surprisingly good foam with a tool many kitchens already have. The jar and whisk methods are best for occasional use or when traveling.
| Method | Cost | Effort | Foam quality | Best for |
|---|---|---|---|---|
| Steam wand | High (espresso machine) | Skill needed | Excellent microfoam | Latte art |
| Electric frother | Medium | Push a button | Very good | Daily lattes, cold foam |
| Handheld frother | Low | Low | Good | Quick drinks, cold foam |
| French press | Low (if owned) | Moderate | Good | No-gadget kitchens |
| Jar or whisk | None | Higher | Fair | Travel, occasional use |
Foam Texture for Each Drink
| Drink | Milk texture | How to get it |
|---|---|---|
| Latte | Silky microfoam, thin layer of foam | Less air, more swirling; electric "latte" or thin foam setting |
| Flat white | Very thin, velvety microfoam | Minimal air, smooth texturing |
| Cappuccino | Thick, airy foam, about one third of the cup | More air at the start; dense foam setting |
| Macchiato | A spoonful of foam on espresso | Any method; spoon foam on top |
| Cold foam drinks | Thick, cold foam | Cold milk with handheld or cold foam setting |
How to Make Cold Foam
Cold foam tops iced coffee and cold brew with a creamy layer. Use very cold skim or two percent milk for stiff foam, or whole milk for creamier foam. Froth with a handheld frother for 30 to 45 seconds, use an electric frother's cold setting, or pump it in a French press. Add a little vanilla syrup before frothing for a sweet cream style topping, then spoon it over your iced drink.
Step by Step Café Drinks
Latte
Brew a double shot of espresso or about 4 ounces of strong coffee into a 12 ounce cup. Froth 8 ounces of milk with minimal air into silky microfoam. Pour the steamed milk into the coffee, holding back the foam with a spoon until the end, then add a thin layer of foam on top.
Cappuccino
Use a smaller 6 ounce cup with a single or double shot. Froth about 4 ounces of milk with more air for thick foam. Pour roughly equal parts espresso, steamed milk and foam, spooning the airy foam on top. Dust with cocoa or cinnamon if you like.
Flat White
Pour a double shot into a 5 to 6 ounce cup. Steam milk with very little air so it is glossy and velvety, then pour it in steadily so the foam blends into the coffee and leaves only a thin layer on top.
Iced Latte With Cold Foam
Fill a glass with ice, add espresso or strong coffee and pour in cold milk, leaving room at the top. Froth a little extra cold milk into thick foam and spoon it over the drink.
Tips for Plant Based Milks
Plant milks behave differently from dairy. Barista oat milk foams smoothly and tastes slightly sweet, making it the most forgiving choice. Barista soy milk foams well but can curdle if the coffee is very acidic or the milk is overheated; warm it gently. Almond milk makes lighter foam with bigger bubbles, so froth it a little longer and serve quickly. Coconut milk beverages foam less and work best in iced drinks.
Keep plant milks very cold, shake the carton before pouring, and stop heating around 140°F, since many plant milks scorch or separate at higher temperatures.
Troubleshooting
- Milk will not foam: use fresher, colder milk, or switch to a barista plant milk.
- Big bubbles: add air more gently, then swirl and tap to break large bubbles.
- Foam collapses quickly: do not overheat milk past about 160°F, and use whole or barista milk.
- Thin, watery foam: add more air at the start or froth longer.
- Scalded taste: stop heating earlier.
Safety Tips
Hot milk and steam can burn, so take a few precautions. Point steam wands away from your hand and purge them into a cloth, not into the air near your face. When microwaving milk, use a microwave safe container, heat in short bursts and stir, since milk can boil over suddenly. Never microwave a sealed jar or a metal lid. Keep handheld frothers switched off until the whisk is in the milk, and keep electric frother bases dry.
Cleaning Up
Clean frothing tools immediately, since dried milk is hard to remove and can harbor bacteria. Rinse whisks by running them in warm soapy water, wash pitchers and jars with warm soapy water, and purge and wipe steam wands after every use. For electric frothers, wipe the nonstick interior with a soft cloth. Keeping your coffee maker clean also improves milk drinks; see our guide on how to clean a coffee maker.
Explore more drink techniques in our coffee guides.
FAQs
What is the easiest way to froth milk at home?
An electric frother is the easiest because it heats and froths automatically. A handheld frother is the cheapest easy option.
Can I froth milk without a frother?
Yes. Use a French press, a jar with a lid or a whisk. Each can produce good foam with a little effort.
What temperature should frothed milk be?
About 140 to 150°F for hot drinks. Hotter milk loses sweetness and foam stability.
Which milk froths best?
Cold whole milk froths most easily into creamy foam. Barista oat milk is the best plant based option for most people.
How long should I froth milk?
With a handheld frother, 15 to 30 seconds for hot milk and 30 to 45 seconds for cold foam. Electric frothers take one and a half to three minutes, and a steam wand usually takes 20 to 40 seconds depending on the machine.
Can I froth milk in the microwave?
You can warm milk in the microwave, then froth it with a handheld frother, jar or French press. Microwaving shaken foam in a jar also helps stabilize it.
Final Thoughts
Now you know how to froth milk at home with almost any tool, from a steam wand to a simple jar. Start with fresh, cold milk, warm it to about 140 to 150°F for hot drinks, add air first, then smooth it into glossy foam. With a little practice, your homemade lattes and cappuccinos will rival your favorite café.