
How To Descale Keurig: A Model-Specific Guide
Disclosure: We may earn a commission when you buy through links on this page, at no extra cost to you. As an Amazon Associate I earn from qualifying purchases. Learn more

How to descale Keurig brewers safely: approved solution, model-specific descale steps, thorough rinsing and clearing the indicator.
Knowing how to descale Keurig brewers correctly matters because mineral scale from tap water slowly builds up inside the heater and water lines, and different Keurig models handle descaling differently. A K-Mini with a one-cup reservoir, a K-Supreme Plus with a descale prompt and a K-Duo with two brewing sides each follow their own manual. This guide explains the descaling task that applies across Keurig brewers and where your model's manual sets the exact steps.
Descaling targets mineral buildup only. It does not clean coffee oils from the pod holder or milk residue from a frother, which are separate jobs we point to below.
Quick Answer and Task Boundary
To descale a Keurig, empty the reservoir and remove any water filter, add Keurig descaling solution or a descaler your manual approves at the amount on its label and manual, run the descaling brews the manual describes (on some models through a descale mode), let the solution sit if instructed, then rinse with several fresh-water brews until the taste and smell are gone. Reinstall the filter afterward. Use vinegar only if your manual approves it.
Cleaning the pod holder, drip tray and reservoir is a separate job covered in our guide on how to clean Keurig brewers; for the general descaling principles across brands, see how to descale a coffee maker.
Identify the Model and the Right Maintenance Task
Find the Exact Model and Manual
Check the label on the bottom or back of your brewer for the full model name and number, then open the manual from the box or Keurig's US support site. Record the full name, such as K-Mini, K-Classic, K-Supreme Plus SMART or K-Duo Hot and Iced, because K-Duo, K-Mini, K-Supreme and Plus variants should not share an assumed set of steps. Find the descaling section and note whether your model has a descale indicator or mode.
Check Whether This Is Cleaning or Descaling
Descaling addresses mineral scale: brews that are slower or smaller than they used to be, a descale light or message on models that have one, and white chalky deposits around water paths. Coffee oils in the pod holder, grounds in the cup and flavor carry-over are cleaning problems. Milk residue is a frother cleaning problem. Match the symptom to the task before buying supplies.
Scale builds faster in some homes than others. Tap water carries dissolved minerals, and the harder your water, the more deposit each heating cycle leaves behind. A household that brews many cups a day on hard water may see slower brews well before the usual reminder, while a light user on soft or filtered water may go longer. The manual and any indicator remain your guide.
What You Need Before Starting
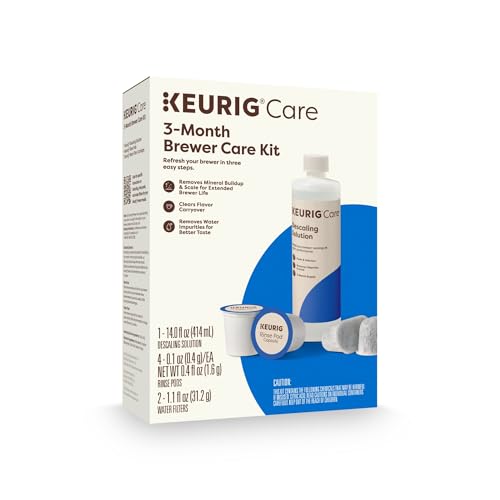
Check the manual for the approved descaler and whether any parts need removing first. Keurig sells its own descaling solution, and its 3-Month Brewer Care Maintenance Kit bundles one descaling solution with rinse pods and water filter refills; Keurig describes using the descaling solution every three months.
- Keurig descaling solution, or another descaler your manual explicitly approves.
- A large ceramic mug or container that fits under the spout and holds the largest brew size; avoid paper cups.
- Fresh water for the rinse brews.
- A place to pour away solution and rinse water.
- A new water filter cartridge, if your model uses one and it is due.
Keep the brewer on a stable surface near the sink. Descaling runs with the machine powered, so follow the manual and never open the housing or touch hot parts during the program.
How To Descale Keurig: Step-by-Step Procedure
Prepare the Correct Components
Turn the brewer off, empty any water left in the reservoir and remove the water filter handle if your model has one, since descaling solution can affect the filter. Remove any used pod from the pod holder and empty the drip tray.
Confirm you are dealing with mineral scale, not just coffee residue. If the only problem is grounds in the cup or a stale taste after strong pods, a cleaning routine or rinse pod is the right tool instead.
Read the descaler's own label alongside the manual. The amount of solution, whether to add water and how much come from those instructions, not from a universal recipe. Different Keurig reservoirs hold different volumes, so the right amount for a 72 oz reservoir differs from a one-cup design.
Start the Approved Task or Program
Fill the reservoir with the solution and any water the instructions call for. Then start descaling the way your manual describes. Some Keurig models run descaling as a series of normal brews at the largest cup size without a pod; others have a dedicated descale mode or a prompt on the display that walks you through the steps.
Use only the buttons, menu entries or prompts listed for your exact brewer. Steps written for one Keurig can be wrong for another; for example, a one-cup reservoir model may ask you to add solution in smaller amounts across several brews, while a combination K-Duo may have steps for both the single-serve and carafe sides.
Place the large mug under the spout before each descaling brew, and pour away the hot solution after each one. Do not drink it.
On combination machines such as the K-Duo, check whether the manual asks you to descale both the single-serve side and the carafe side, and in which order. A shared reservoir does not automatically mean one side's descaling cycle reaches the other side's water path.
Complete the Cleaning or Descaling Stage
Continue the descaling brews until the manual's stopping point, such as the reservoir indicator showing add water or the program announcing the next stage. Many descaling procedures include a waiting period with the brewer on so the solution can work in the heater; follow the manual's timing exactly.
Do not interrupt or repeat the program unless the manual permits it. Stopping partway can leave solution sitting in the lines, and running repeated cycles without reason wastes descaler and can stress seals.
If the brewer stops dispensing or makes unusual noises during descaling, switch it off and check the manual's troubleshooting section. Unplug it if you see damage, smell burning or notice water near electrical parts, and contact Keurig support.
Finish the Required Rinse and Reassembly
Empty any remaining solution from the reservoir, rinse the reservoir thoroughly and fill it with fresh water to the level the manual states. Run the number of fresh-water rinse brews the manual specifies, again at the largest size and without a pod, pouring each one away.
Keep rinsing until there is no taste or smell of descaler in the water. Some manuals specify a minimum number of rinse brews, and some Keurig models guide you through the rinse stage on the display.
Reinstall the water filter handle with a fresh or still-valid cartridge, refill the reservoir and brew one normal cup to check everything works. If your model had a descale indicator, it should clear at the end of the procedure; some models need a specific completion step described in the manual.
Check the Result Before Normal Use
Confirm Completion
Descaling is complete when the manual's end-of-procedure step is done, any descale indicator has cleared, rinse water tastes and smells neutral, and brews return to their usual size and speed. It helps to note the date on a sticker or in your phone so you can compare how quickly scale returns next time. Check that the reservoir and filter handle are seated correctly and that there are no leaks around the base.
If a Prompt or Symptom Remains
If the descale light remains or brews stay short, recheck that you completed every step, including rinse brews and any reset. A clogged entrance or exit needle can also cause short cups, so follow the manual's needle cleaning steps. If the problem continues, contact Keurig support rather than running repeated descaling cycles blindly.
Common Mistakes to Avoid
- Using the wrong task: descaling removes mineral scale; it does not clean coffee oils from the pod holder or milk residue from a frother.
- Treating products as interchangeable: vinegar, cleaning tablets, rinse pods and descaling solution do different jobs. Use vinegar only if your Keurig manual approves it.
- Guessing the amount: take solution and water amounts from the descaler label and the manual, not from a recipe for another brand.
- Leaving the filter in: many Keurig manuals have you remove the water filter before descaling.
- Copying controls from a different model: descale modes, prompts and buttons vary across Keurig generations.
- Skipping rinse brews: leftover solution affects taste and can leave residue.
Frequently Asked Questions
Which cleaner is approved for this model?
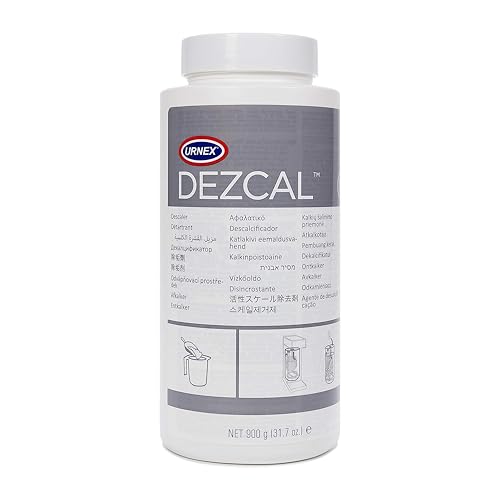
Keurig's own descaling solution is the safest choice, since Keurig designs its descaling instructions around it. Some manuals also mention other approved methods; check yours before using third-party descalers or vinegar. Universal descalers state broad compatibility on their labels, but your Keurig manual and warranty terms take priority.
How often should I perform this task?
Keurig's maintenance kit describes descaling every three months, and models with an indicator will also prompt you when it is due. Homes with hard water may need to descale more often. For a full schedule that includes cleaning, filters and rinse pods, see our coffee maker maintenance guide.
What if the cleaning or descaling alert remains?
An alert that remains usually means a step was missed, such as the final rinse brews or a completion step the manual describes. Repeat only the missing step if the manual allows it. If the alert still stays on, contact Keurig support with your model number and a description of what you did.
Can I use a generic method from another coffee maker?
No, not for the steps that matter. The idea of descaler, brews, waiting and rinsing carries over, but solution amounts, descale modes and the number of brews are model specific. Follow your Keurig manual. If problems continue after descaling, our coffee maker troubleshooting guide can help narrow the cause.
Keep the Routine Simple
The routine for how to descale Keurig brewers is simple once you have the manual open: remove the filter, add the approved descaler as directed, run the descaling brews or mode, wait if instructed, rinse thoroughly and refit the filter. Keep cleaning and rinse pods as separate, more frequent jobs.
Between descaling sessions, small habits slow scale buildup: use fresh water each day, keep the water filter current if your model has one, and avoid leaving water sitting in the reservoir for days. These do not replace descaling, but they help the brewer stay closer to its normal speed and cup size between sessions.
Put a reminder in your calendar every few months, or when your model prompts you, so you know how to descale Keurig brewers on time rather than after brews slow down. If you are considering a replacement brewer, our guide to the best Keurig coffee maker compares current models.


