
How to Make Latte Art: Heart, Tulip and Rosetta
Disclosure: We may earn a commission when you buy through links on this page, at no extra cost to you. As an Amazon Associate I earn from qualifying purchases. Learn more
How to make latte art at home, from steaming microfoam to pouring a heart, tulip and rosetta.
To learn how to make latte art, you need two things: a well extracted shot of espresso with good crema in a wide cup, and silky microfoam steamed to about 140 degrees Fahrenheit with tiny, invisible bubbles. Pour the milk from a few inches high into the center of the cup until it is about half full, then bring the pitcher spout close to the surface so white foam flows out and forms a shape, and finish with a quick cut through the design. Start with a heart, then move on to a tulip and a rosetta.
Below we cover the equipment, how to steam milk for latte art, the basic pour, step by step instructions for a heart, tulip and rosetta, practice tips, common mistakes and fixes, and answers to frequent questions.


What You Need to Make Latte Art
You need an espresso machine with a steam wand, a stainless steel milk pitcher with a pointed spout, fresh cold milk and a wide cup. Latte art is possible with some electric frothers, but a steam wand gives the most control.
- Espresso machine with a steam wand: for microfoam and fresh crema.
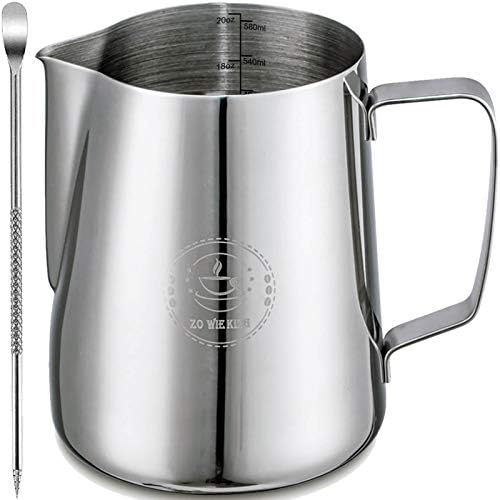
- Milk pitcher: 12 ounces for one drink, 20 ounces for two; a sharp spout helps detail.
- Cold whole milk: the easiest milk to learn with.
- Wide cup: 8 to 12 ounces with a round bottom.
- Thermometer (optional): helps you stop at the right temperature.
Why Microfoam Matters
Latte art only works with microfoam, milk that has been textured into tiny, uniform bubbles so it looks glossy, like wet paint, and flows like melted ice cream. Thick, bubbly cappuccino foam sits on top and will not draw lines. Microfoam blends with the crema at first, then floats on the surface to create white shapes against the brown espresso. Getting the milk right is about 80 percent of latte art.
How to Steam Milk for Latte Art
To steam milk for latte art, add a small amount of air at the start and spend most of the time swirling the milk into a smooth vortex.
- Fill a cold pitcher with cold milk to just below the base of the spout.
- Purge the steam wand to clear water.
- Place the tip just under the surface, slightly off center, and turn the steam on fully.
- Stretch for 2 to 4 seconds, listening for a soft tearing sound, until the milk grows by about 20 to 30 percent.
- Lower the tip slightly to create a whirlpool, which breaks big bubbles into microfoam.
- Stop at about 140 degrees Fahrenheit, when the pitcher is just too hot to hold comfortably.
- Tap the pitcher on the counter to pop any bubbles and swirl it until the milk looks glossy.
Our guide on how to froth milk at home explains milk texturing in more detail, and our best milk frothing pitcher guide covers pitchers with latte art spouts.
Prepare the Espresso
Pull a fresh double shot directly into a wide cup just before you finish steaming. Good crema creates the brown canvas for your design, so use fresh beans and a well dialed in shot. Let the espresso sit no more than 30 seconds before pouring, or the crema starts to fade. Our guide to the best coffee beans for espresso lists blends that produce rich crema.
How to Make Latte Art: The Basic Pour
Every design uses the same two stage pour: a high pour to mix, then a low pour to draw.
Stage 1: Mix the Base
Tilt the cup toward you at about 45 degrees. Pour a thin stream of milk from 3 to 4 inches above into the center of the espresso. The milk dives under the crema and mixes into a smooth, brown base. Keep pouring until the cup is about half full.
Stage 2: Draw the Design
Bring the pitcher spout down almost to the surface and increase the flow slightly. White foam will appear on top. As the cup fills, slowly level it back to flat. Move the pitcher to shape the design, then lift and cut through to finish.
How to Pour a Latte Art Heart
The heart is the first design to learn and the foundation of the others.
- Pour high into the center until the cup is half full.
- Lower the spout close to the surface in the center of the cup.
- Hold steady and let a white circle form and grow as you level the cup.
- When the cup is nearly full, lift the pitcher a few inches.
- Pour a thin stream through the circle toward the far side, pulling it into a heart shape.
How to Pour a Tulip
A tulip is a stack of hearts. Pour the base, lower the spout and push out a small white blob, then stop. Move the spout slightly back and push out a second blob into the first, pushing it forward. Repeat for three to five layers, then lift and cut through all of them to finish. The key is to stop and start the flow cleanly between layers.
How to Pour a Rosetta
A rosetta looks like a fern leaf. After the base, lower the spout near the back of the cup and wiggle the pitcher gently side to side with your wrist while slowly moving it backward toward you. The wiggling creates zig zag lines that stack into leaves. When you reach the edge, lift the pitcher and pour a thin line forward through the center to form the stem.
How to Practice Latte Art
The fastest way to improve is to pour often and practice one design at a time. Some useful tips:
- Practice with water and a drop of dish soap in the pitcher to learn pouring motions without wasting milk.
- Focus on milk texture first; if the foam is wrong, no technique will save the design.
- Pour at the same height and speed each time to build muscle memory.
- Watch your flow rate; too slow and the foam will not come out, too fast and it breaks up.
- Use a wide cup while learning, since it gives more room.
Best Milk for Latte Art
Whole milk is the easiest for latte art because its fat and protein create stable, glossy microfoam. Two percent milk works but is a little less forgiving. Skim milk makes stiff foam that is hard to pour. For plant milk, barista style oat milk pours the best designs; soy works well too. Always use fresh, cold milk, since older milk foams poorly.
Best Cups for Latte Art
Use a wide, bowl shaped cup of 8 to 12 ounces with a round bottom. The curve helps milk roll under the crema, and the wide surface gives space for designs. Narrow, straight sided glasses make latte art much harder. Porcelain cups also hold heat so the crema stays stable. Double wall glass mugs look beautiful but are narrower, so they suit simple hearts.
Common Latte Art Mistakes and Fixes
Most latte art problems come from milk texture, pouring height or timing.
- No white foam appears: the spout is too high or the milk has too little foam; pour closer and add a bit more air while steaming.
- Design looks blobby and thick: too much foam; stretch the milk for less time.
- Design sinks and disappears: pouring too high during the drawing stage; lower the spout.
- Bubbles in the design: large bubbles in the milk; tap and swirl the pitcher before pouring.
- Foam separated from milk: you waited too long after steaming; pour right away and swirl first.
- Lines are messy: the cup was not leveled smoothly; practice leveling as you pour.
Latte Art Designs to Try Next
Once you can pour a heart, tulip and rosetta, these designs build on the same skills.
Wing Tulip
Pour a few wiggled lines at the back of the cup before stacking tulip layers, which adds feathered "wings" around the design.
Swan
Pour a rosetta off to one side, then draw a curved neck and a small heart for the head with a thin stream of milk. It takes steady control of flow.
Inverted Tulip
Push each tulip layer from the far side toward you so the stack points the other way. It trains precise starts and stops.
Slow Rosetta
Wiggle more slowly with a slightly higher flow to create fewer, wider leaves with crisp lines.
Can You Make Latte Art Without an Espresso Machine?
It is possible but harder. Some electric frothers make fairly smooth foam, and you can improve it by tapping and swirling the milk before pouring. Strong coffee from a moka pot or AeroPress works as a base, though it has little crema, so contrast is lower. Simple hearts are achievable; detailed rosettas usually need a steam wand.
Free Pour vs Etching
Free pour latte art is created only by pouring milk, like hearts, tulips and rosettas. Etching uses a thin tool, such as a toothpick or latte art pen, to draw details into the foam after pouring, which allows faces, animals and swirls. Many baristas combine both: a free pour base with etched details. Etching is easier for beginners but fades faster.
Keep Your Equipment Clean
Clean milk equipment makes better foam. Purge and wipe the steam wand after every use, wash the pitcher right away and descale your machine regularly, since scale can reduce steam pressure. Our guide on how to clean a coffee maker explains the basics. Browse more guides in our coffee guides section, or learn the base drinks in our guides on how to make a latte at home and how to make a cappuccino at home.
FAQs About Latte Art
What is the easiest latte art to learn?
The heart is the easiest. It teaches the basic pour that tulips and rosettas build on.
Why won't my milk make latte art?
Usually the milk has too much or too little foam, or large bubbles. Aim for glossy microfoam, like wet paint.
What temperature is best for latte art milk?
About 135 to 145 degrees Fahrenheit. Hotter milk loses texture and sweetness.
Do I need a special pitcher for latte art?
A stainless steel pitcher with a pointed spout helps a lot, especially for detailed designs.
Can I make latte art with oat milk?
Yes. Barista style oat milk steams into smooth microfoam that pours well.
How long does it take to learn latte art?
Many people pour a recognizable heart within a few dozen tries. Rosettas take longer practice.
Can I make latte art on a cappuccino?
Yes, but it is harder because cappuccino foam is thicker. Simple hearts work if you steam slightly wetter foam than a classic dry cappuccino and pour close to the surface.
Final Thoughts
Knowing how to make latte art comes down to good espresso, glossy microfoam and a two stage pour: high to mix, low to draw. Master the heart, then the tulip and rosetta, and practice often. With patience, every latte you make at home can look as good as it tastes.


